
How to make Survival Cement
One of the most useful substances one can use outdoors is Survival Cement. The Anasazi were using it 1000 years ago.
This mixture of mud and grasses can be used for a multitude of projects, from construction of shelters, cooking structures, kilns and food caches, to wrapping food for clay baking and much more.
Survival cement has been used throughout the eons of history in countless ways.
It is simple to make, the ingredients are easy to come by and it is one of the most durable resources available in a primitive situation. In fact, during a trip to Utah a couple of years ago we encountered some Anasazi ruins that were many hundreds, if not thousands of years old where the survival cement was still intact. (See photos below) How many modern buildings will be able to say that?!
Tips for Making Good Survival Cement
- If you are using your survival cement as a mortar, create a mixture that is thinner and wetter so that it will fill each and every crevasse and joint.
- Cut your grasses based on the length of the item for which you will be using your cement. If you are building a large structure such as a kiln, or cementing over a shelter foundation the grasses can be left much longer and placed so they run all in one direction as opposed to haphazardly throughout the mud. In this way they act almost like re-bar. (See an Anasazi example below.)
- If you do not gather enough grass and have to go harvest more mid-making, cover and seal your existing survival cement as best you can while you are gone so it will retain the proper moisture content.
- If you must add water to help rehydrate your mud, do so a LITTLE AT A TIME. It’s much easier to add more water than to try to re-create the proper consistency once the mud is soupy.
Step-by-step Instructions for Making Survival Cement:
- Find a source of mud with as high a clay content as possible ‘If you smush some of the mud into a ball and it retains it’s shape, you should be good.) and fill up a bucket with it — more if you are planning a large project.

- Harvest a big armload of grasses, preferably dry — more if you are planning a large project — and cut them into lengths of about 6-12 inches.

- Hydrate to your clay to a point where it will squish, not run, easily through your fingers. The consistency must be wet enough that it can be molded, but not so watery that it will not hold it’s shape. Wetter mixes are good for mortar between stones, firmer for making bricks and solid survival cement structures, firmer still for wrapping food.

- Spread a tarp on the ground and place the bucket of mud and the grasses at the edges of the tarp.

- Dump the mud out of the bucket into the center of the tarp and place about half of your grass on top of the mud.


- Get barefoot, and begin to stomp the grasses into the mud. Or, if you’re not inclined to get your feet dirty, do like Eddie and fold a corner of the tarp over top and stomp on that!


- Once the mud/grass mixture has spread out and flattened, step off the tarp and fold it in half, turning the mixture back onto itself. Do this a couple of times until it has formed back into a sort of ball.


- Add the remaining grass and start stomping once again. Continue to repeat this process until the grass has been thoroughly combined into the mud. You want the grass to be between 40%-60% of your mixture, depending on the project.


- Begin your survival cement project immediately, as once it begins to dry out the mud will harden and be difficult to mold. In these photos Eddie is fashioning a mud brick for an upcoming project.


Now Get Muddy, and Have Fun!
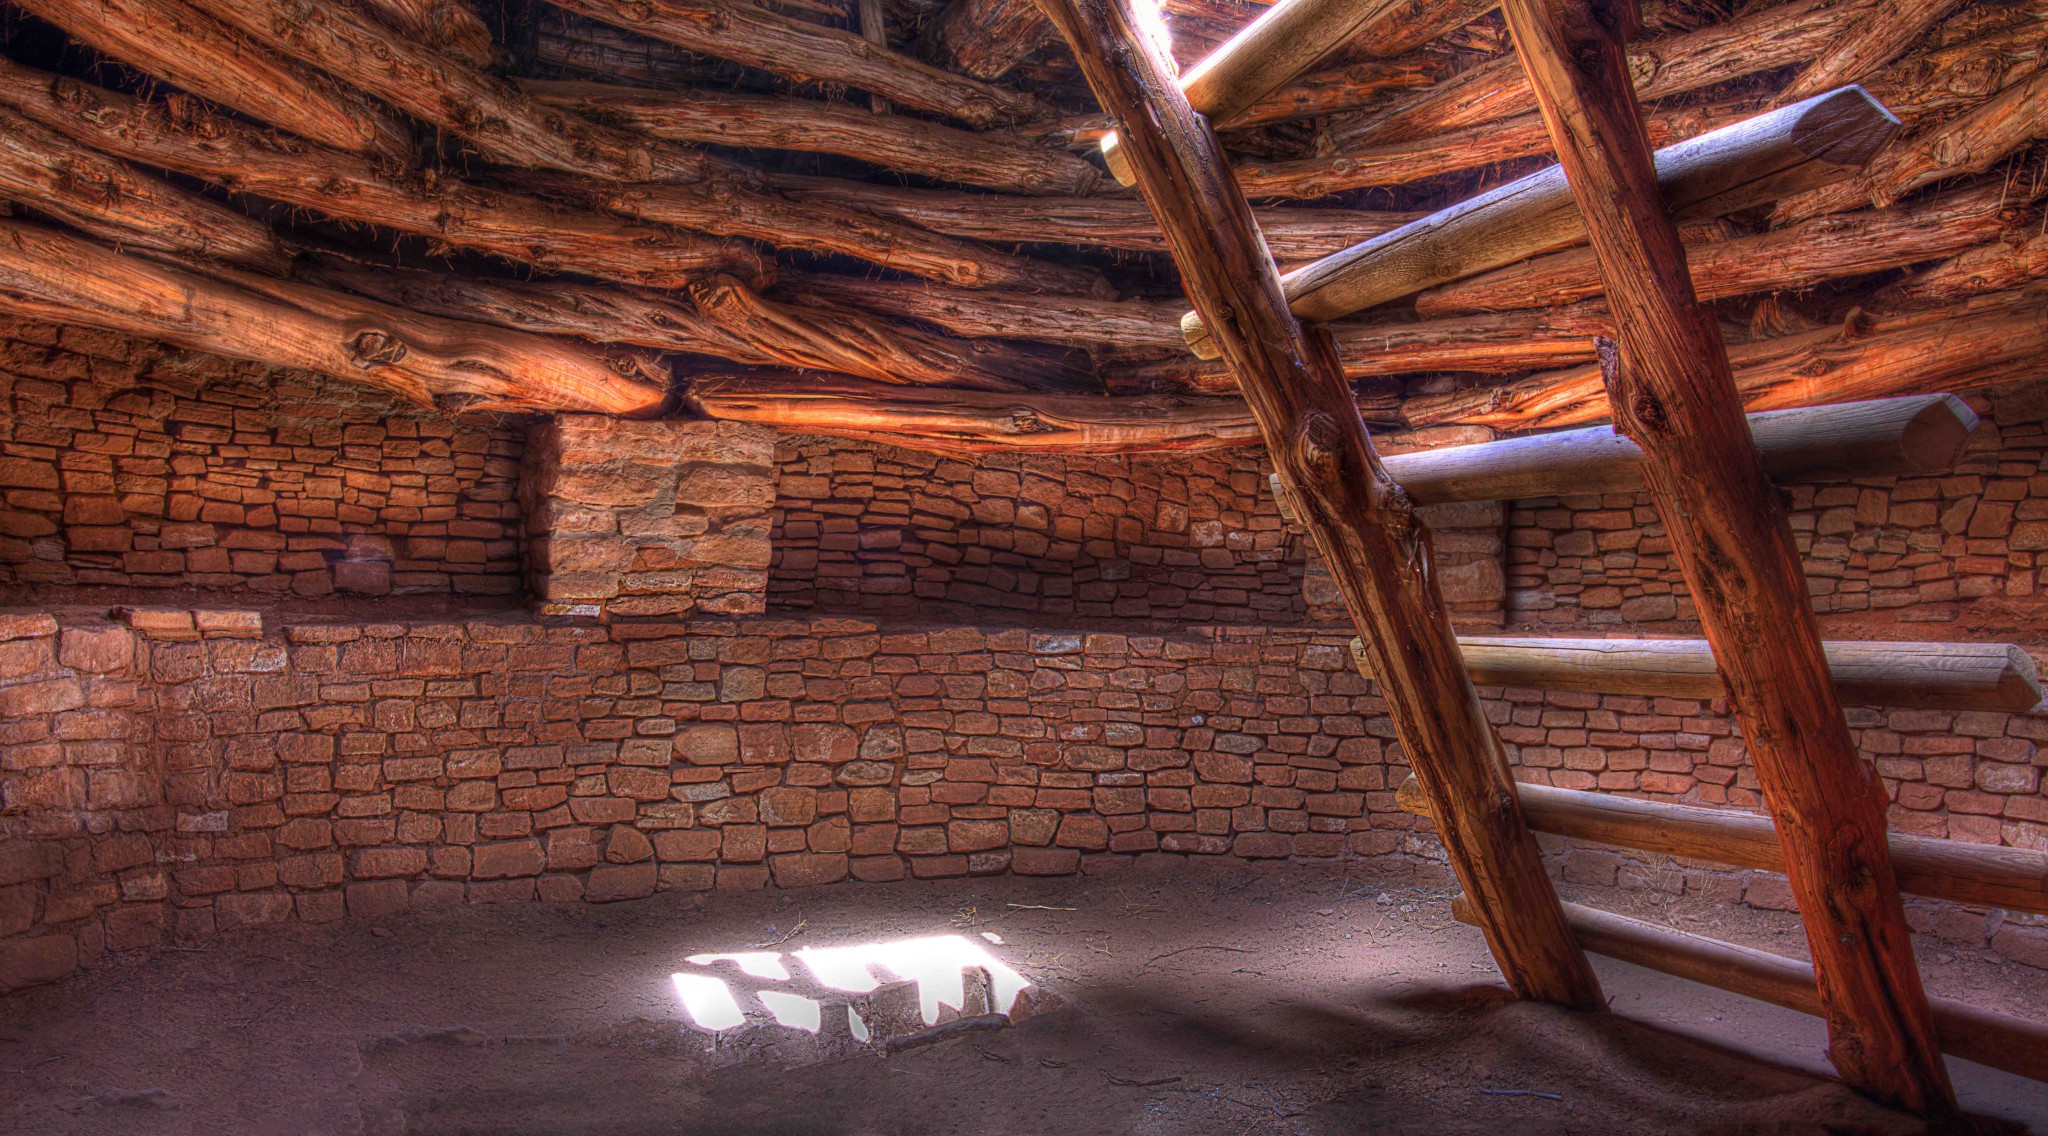
Examples of Anasazi usage of Survival Cement from southern Utah
On a trip to southern Utah a few years ago we hiked up to explore some ancient Anasazi ruins high up in a canyon. The photos below show some amazing examples of the durability of survival cement after hundreds, if not thousands of years!
The dwellings were mortared with survival cement to amazing effect, and the dried grasses are still fully intact!


 Note how the grasses have been placed parallel to each other to create an extrememly strong, re-bar type effect.