
How to make a cool wood burning pocket stove
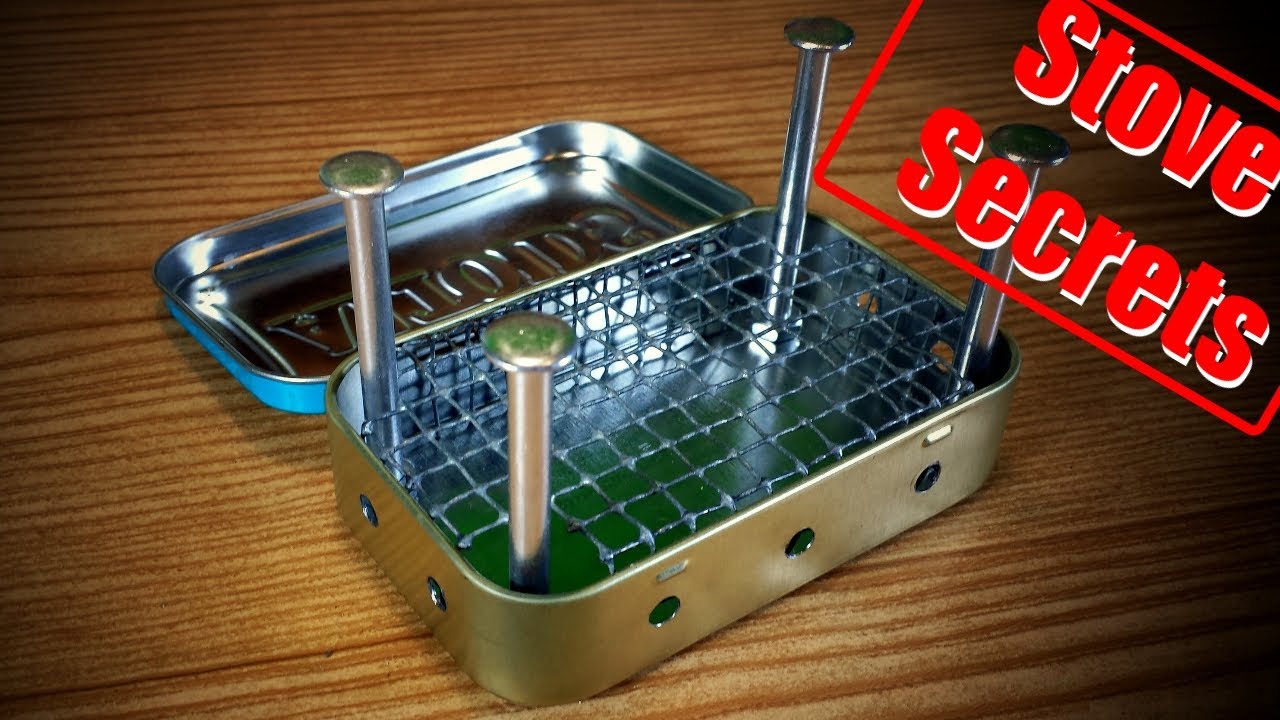
There are a million and one uses for small tin containers, and one of the most useful can be to fashion a miniature and self-contained wood stove. This trick works best with a rectangular Altoids tin, but you can also use things like shoe polish containers as well. Let’s take a look at how you can build yours in just a few minutes with some tools that you probably have on hand. This little stove can give you enough heat to make a small meal or heat a serving or two of water.
To get started, you will need a 3×5 piece of firm screen or wire mesh, four aluminum posts and screws that are around 2” long, and four hex nuts that will fit on the screws. Take a marker and place a dot ¼ of an inch from each of the corners of the bottom of the Altoids tin. Open the tin and mark a line along the middle of each side except on the one that has the hinges for the lid. Place two dots, evenly spaced apart on the top and bottom sides and three evenly spaced dots along the longer side. Cover the tin and turn upside down.
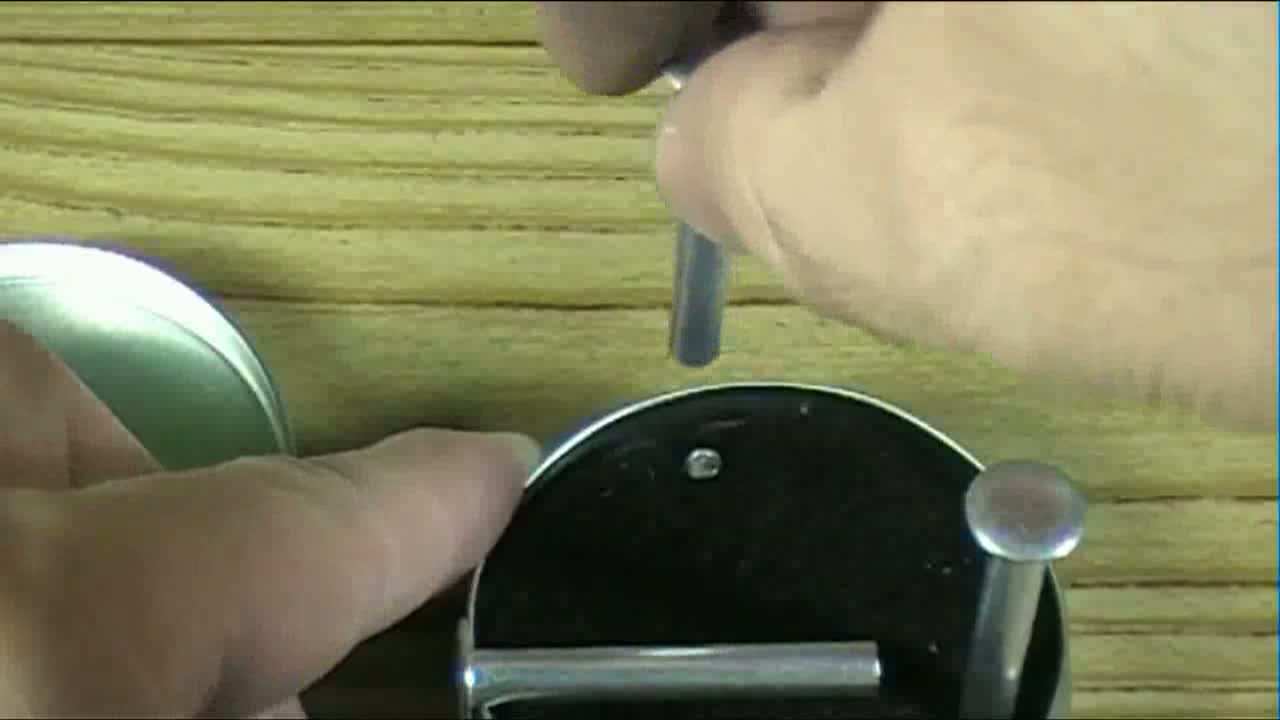
Take a drill with a 1/16 bit and drill out the holes that you made on the bottom of the tin. Repeat the process for each of the holes that you marked on the sides of the tin as well. The next step is to make the holes bigger by using a 3/16 bit. Take the bolts/screws from the aluminum posts and place them through the outside of the bottom holes so they protrude into the tin. Make sure that you use bolts or screws that have a flat or rounded head.
Place the hex nuts over the threads and secure each screw or bolt in place by holding the screws with a flathead screwdriver and using some needle-nose pliers to tighten the bolts. Keep the lid of the tin open and place the screen or mesh over the top. Center it and outline the shape of the tin on top of the material with the marker.
The next step is to cut the material so that you can bend some of the excess downward. This will create “legs” that will hold the material in place in the tin. The easiest way to do this is to cut off a ½ inch square from each of the four corners of the material. This will allow you to bend each side down at a 90 degree angle. Place the material in the tin and make sure that it doesn’t rise above the walls. Use pliers to make the bends as even as possible.
Finally, take the aluminum posts and screw them on top of the bolts that are protruding from the inside of the tin. Since you made square cuts in the steps above, there should be a gap in the screen or mesh above and around the bolts. Securely tighten the bolts, and don’t worry that you can’t close the lid of the Altoids tin.
The beauty of this project lies in its simplicity, because the design allows you to store everything that you need to cook in the tin. Remove the posts and screen, and you should have enough room to place some cotton balls, steel wool or other fuel source in addition to some matches and a lighter, as well as the posts, beneath the screen. All you need to do is attach the posts, place the material on the screen and ignite. Try this trick out for yourself, and see how easy it is to carry a self-contained stove in your pocket today.